Discovering the Secret to the Best Boiled Corn on the Cob
There's a quintessential joy that comes with biting into a perfectly cooked ear of sweet corn. While various methods can bring this summer staple to your plate, boiling remains a time-honored classic for a reason. It's not just simple; it's a method that truly allows the corn's natural sweetness and crisp texture to shine, making it arguably the best boiled corn on the cob experience. Forget complicated recipes involving milk baths or sugar — when you start with quality ingredients and follow a few straightforward steps, the results are nothing short of spectacular.
Boiled corn on the cob is a versatile side dish, a blank canvas ready for your favorite toppings, or even a star ingredient when cut off the cob for salads, salsas, and soups. Its simplicity makes it the perfect accompaniment to virtually any summer meal, from backyard BBQs to quiet weeknight dinners. The secret to achieving truly exceptional boiled corn lies not in elaborate additions, but in mastering a few key fundamentals. Let's dive into how to unlock the peak flavor of this beloved seasonal delight.
The Foundation: Sourcing the Sweetest Corn
The journey to the best boiled corn on the cob begins long before the water heats up – it starts with selecting the freshest ears. Unlike some vegetables that can withstand a few days of waiting, corn begins converting its natural sugars to starch almost immediately after being picked. This means the quicker it goes from field to pot, the sweeter and more succulent your corn will be.
How to Identify Peak Freshness
- Go Local and Seasonal: Your best bet for truly fresh corn is a local farmer's market, roadside stand, or a grocery store that proudly showcases seasonal, locally sourced produce. This minimizes the time between harvest and your kitchen.
- Examine the Husks: Look for bright green, tightly wrapped husks. These indicate recent harvest and good moisture retention. Avoid ears with dry, yellowing, or loose husks, as these indicate older corn that has likely lost its prime sweetness.
- Check the Silks: The silks at the top should be slightly damp and sticky to the touch. While their color can vary, dried-out, brittle silks suggest the corn has lost valuable moisture and might be past its prime.
- Peek at the Kernels (if possible): Gently peel back a small section of the husk at the top. The kernels should be plump, firm, and fully extend to the tip of the cob. Shriveled, mushy, or missing kernels are a sign to pass on that ear.
- Prioritize Prompt Cooking: Ideally, boil your corn the same day you purchase it. If you must wait a day or two, store the corn in its husk in the refrigerator. The husk acts as a natural protective layer, helping to retain moisture and slow down the sugar-to-starch conversion process.
Prepping for Perfection: From Husk to Pot
Once you've secured your pristine ears of corn, a little preparation goes a long way in ensuring a seamless cooking experience. This step is quick and straightforward, bringing you closer to the best boiled corn on the cob.
- Shuck the Corn: Begin by peeling back the green husks from the top of the cob down to the stem. Break them off near the base. Then, grab the bundle of silks at the top and pull them away. For any stubborn strands, a slightly damp paper towel can be surprisingly effective at wiping them clean.
- Trim the Ends: If necessary, use a sharp knife to trim the stem end of the cob. This is particularly useful if your corn is very long and you need it to fit comfortably in your pot. Trimming also provides a cleaner aesthetic for serving.
- Consider Cutting (Optional): For smaller servings, children, or if you're planning to cut the corn off the cob after cooking, now is the time to slice the ears into halves or thirds. This can also help if you have a smaller pot but many ears to cook, maximizing space.
- A Quick Rinse: After shucking, give the ears a quick rinse under cool water to ensure they are free of any remaining silk or debris. This helps ensure a clean, pure taste.
The Art of Boiling: Timing is Everything
This is where the magic happens, and it's surprisingly simple. The key to achieving the best boiled corn on the cob is precise timing – you want to cook it just enough to enhance its sweetness and tenderness without turning it mushy or starchy. Overcooking is the enemy of perfectly boiled corn.
- Choose the Right Pot: Select a large pot (like a stockpot) that can comfortably accommodate all the ears of corn you plan to cook, allowing them to be fully submerged in water. If cooking for a large group, you might need to work in batches or use your biggest stockpot. Adequate space prevents uneven cooking.
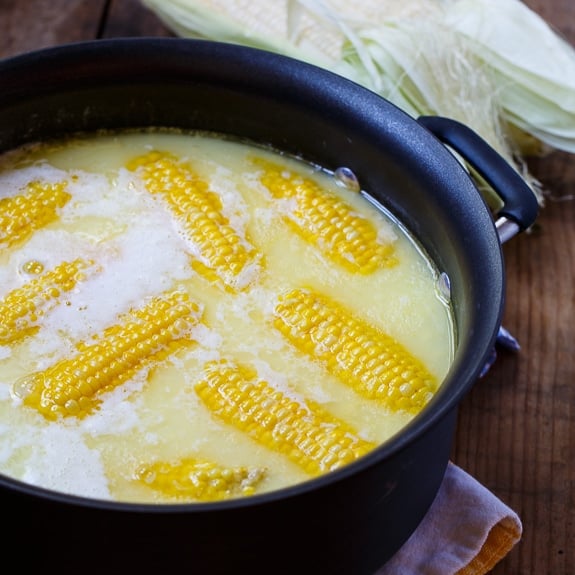
- Fill with Plain Water: Fill the pot with enough plain water to cover the corn completely. Resist the urge to add sugar, milk, or butter to the boiling water. While some recipes suggest these additions, truly fresh sweet corn doesn't need them. For corn at its peak, these additions can actually dilute its natural flavor or even toughen the kernels by affecting the osmotic pressure. The goal here is to let the corn's inherent deliciousness shine through.
- Bring to a Rolling Boil: Place the pot on high heat and bring the water to a vigorous, rolling boil. This ensures a consistent cooking temperature once the corn is added.
- Add the Corn Carefully: Using tongs, gently lower the ears of corn into the boiling water. Be mindful of splashes. The water temperature will drop momentarily as the cooler corn enters.
- Start Your Timer: Once the water returns to a full, vigorous boil, set your timer for just 4 to 5 minutes. For exceptionally fresh or smaller ears, even 3 minutes might suffice. This short cooking window is crucial. Overcooked corn becomes tough, chewy, and loses its vibrant color and crisp pop, transforming from sweet to starchy.
- Monitor for Doneness: The kernels will transform into a brighter, more vibrant golden yellow and appear slightly plumper when perfectly cooked. You can carefully remove one ear and test a kernel for tenderness and flavor if you're unsure. It should offer a gentle pop and be sweet, not mushy.
For more nuanced approaches, explore alternative seasoning techniques in the best boiled corn on the cob - Article 2. And if you're curious about different cooking methods beyond boiling, you'll find great insights in the best boiled corn on the cob - Article 3.
Serving and Storing Your Perfectly Boiled Corn
The moment your corn is done, prompt action is crucial to maintain its quality and prevent it from becoming waterlogged. This final stage ensures you enjoy the best boiled corn on the cob possible, whether immediately or later.
- Remove Immediately: As soon as the timer goes off, use tongs to remove each ear of corn from the hot water. Do not leave the corn sitting in the pot, as it will continue to cook and absorb water, leading to a soggy, undesirable texture.
- Keep Warm for Serving: If you're not serving immediately, place the hot ears in a covered dish or wrap them loosely in aluminum foil. This will keep them warm for a short period without further cooking, ideal for gathering everyone around the table.
- Classic Servings: The ultimate simple dressing for perfectly boiled corn is a generous slather of butter, a sprinkle of flaky sea salt, and freshly cracked black pepper. However, feel free to experiment with a squeeze of lime and chili powder, a dusting of grated Parmesan, or fresh herbs like cilantro or parsley for an added flavor kick.
- Reheating Leftovers: Boiled corn reheats surprisingly well, making it excellent for meal prep.
- Oven Method: Wrap each ear individually in aluminum foil and warm in a preheated oven at 350°F (175°C) for 10-15 minutes, or until heated through.
- Microwave Method: Wrap an ear in a damp paper towel and microwave for 30-60 seconds, or until heated through. The damp paper towel helps maintain moisture.
- Utilizing Leftovers: Don't let any leftover boiled corn go to waste! Cut the kernels off the cob and add them to vibrant salads, make a refreshing corn salsa, blend them into creamy soups, or incorporate them into stir-fries, omelets, and casseroles. Cooked kernels also freeze well for later use in winter dishes.
Conclusion
Achieving the best boiled corn on the cob is a testament to the power of simplicity and fresh ingredients. By focusing on selecting peak-season corn, preparing it thoughtfully, and boiling it for just a few minutes, you can consistently produce ears that burst with natural sweetness and a satisfying crunch. This method celebrates the corn itself, allowing its inherent flavors to shine without unnecessary embellishments, making it a truly unforgettable summer delight. So, next time you crave that iconic taste, remember these easy steps and prepare to enjoy corn at its absolute finest.
